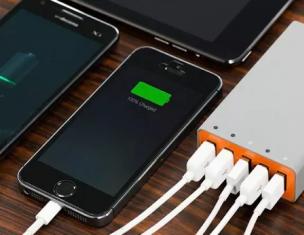
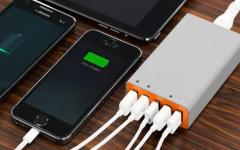
If you are interested in how to charge a lithium-ion battery, then you have come to the right place.
Modern mobile devices require an independent power source.
Moreover, this is true both for “high technologies” like smartphones and for simpler devices, say, electric drills or multimeters.
There are many different types of batteries. But for portable equipment, Li-Ion is most often used.
The relative ease of production and low cost led to such a wide distribution.
This was facilitated by excellent performance, plus low self-discharge and a large margin of charge-discharge cycles.
Important! For greater convenience, most of these batteries are equipped with a special control device that prevents the charge from passing critical levels.
In the event of a critical discharge, this circuit simply stops supplying voltage to the device, and when the permissible charge level is exceeded, it cuts off the incoming current.
A phone or tablet with a lithium-ion battery must be charged when the battery indicator is at 10-20%.
At the same time, after reaching the nominal 100%, charging should last another one and a half to two hours.
This is necessary because the actual battery will be 70-80% charged.
Advice! Approximately once every three months it is necessary to carry out a preventive discharge.
When charging from a laptop or desktop computer, it must be borne in mind that the USB port is unable to provide sufficient high voltage, therefore, the process will take longer.
Alternating full and partial (80-90%) charge cycles will extend the life of the device.

Despite such a smart architecture and general unpretentiousness, following some rules for using batteries will help extend their life.
So that the battery of the device does not “suffer”, it is enough to follow simple recommendations.
Rule 1: Don't let your battery drain completely
Lithium-ion batteries of modern designs do not have a “memory effect”. Therefore, it is better to charge them before the moment of complete discharge comes.
Some manufacturers measure the life of their batteries by the number of charge cycles from zero.
The highest quality products can withstand up to 600 such cycles. When charging a battery with 10-20% remaining, the number of cycles increases to 1700.
Rule 2. A complete discharge still needs to be taken every three months.
With unstable and irregular charging, the average statistical marks of the maximum and minimum charges in the previously mentioned controller go astray.
This leads to the fact that the device receives incorrect information about the amount of charge.

Preventive discharge will help prevent this. When the battery is completely discharged, the minimum charge value in the control circuit (controller) will be reset to zero.
After that, it is necessary to charge the battery "to the eyeballs", having kept from eight to twelve hours in a state connected to the network.
This will update the maximum value. After such a cycle, the battery will be more stable.
Rule 3. An unused battery must be stored with a small amount of charge
Before storage, it is better to charge the battery by 30-50% and store at a temperature of 15 0 С. Under such conditions, the battery can be stored for quite a long time without much damage.
A fully charged battery will lose a significant amount of capacity during storage.
And completely discharged after a long storage, it remains only to give it for processing.
Rule 4. Charging must be done only with original devices
It is noteworthy that the charger itself is built into the design of the mobile device (, etc.).
The external adapter in this case acts as a rectifier and voltage stabilizer.

Cameras are not equipped with such a device. That is why their batteries must be removed and charged in an external device.
The use of third-party "charging" can adversely affect their condition.
Rule 5. Overheating is detrimental to Li-Ion batteries
High temperatures have an extremely negative effect on the design of batteries. Low ones are also fatal, but to a much lesser extent.
This must be remembered when using lithium-ion batteries.
The battery must be protected from direct sunlight and used at a distance from heat sources.
The permissible temperature range is between -40 0 C and +50 0 C.
Rule 6
It is not safe to use non-certified chargers. In particular, common Chinese-made "frogs" often ignite during the charging process.

Before using such a universal charger, you should check the maximum allowable values indicated on the packaging.
So, attention must be paid to the maximum capacity.
If the limit is less than the capacity of the battery, then at best it will not fully charge.
When the battery is connected, the corresponding indicator on the frog body should light up.
If this does not happen, then the charge is critically low or the battery is out of order.
When the charger is connected to the network, the connection indicator should light up.
Another diode is responsible for achieving the maximum charge, which is activated in appropriate conditions.
How to charge and maintain a lithium-ion battery: 6 simple rules
At the present time, lithium-ion batteries are very popular, they are used in various gadgets, such as phones, smart watches, players, flashlights, laptops. For the first time, a battery of this type (Li-ion) was released by the well-known Japanese company Sony. A schematic diagram of the simplest batteries is shown in the picture below, by assembling it, you will have the opportunity to independently restore the charge in the batteries.
Homemade lithium battery charging - electrical circuit
The basis for this device are two stabilizer chips 317 and 431 (). The integral stabilizer LM317 in this case serves as a current source, we take this part in the TO-220 package and be sure to install it on the heat sink using thermal paste. The TL431 voltage regulator manufactured by texas instruments also exists in SOT-89, TO-92, SOP-8, SOT-23, SOT-25 and other packages.


Light-emitting diodes (LED) D1 and D2 of any color that is pleasant for you. I chose the following: LED1 red rectangular 2.5 mm (2.5 miles Candel) and LED2 green diffuse 3 mm (40-80 miles Candel). It is convenient to use smd LEDs if you do not install the finished board in the case.

The minimum power of the resistor R2 (22 Ohm) is 2 watts, and R5 (11 Ohm) is 1 watt. All remote 0.125-0.25W.

A 22 kilo-ohm variable resistor must be of the SP5-2 type (imported 3296W). Such variable resistors have a very precise resistance adjustment, which can be smoothly adjusted by twisting a worm pair that looks like a bronze bolt.

Photo of measuring the voltage of a li-ion battery from a cell phone before charging (3.7V) and after (4.2V), capacity 1100 mA*h.
PCB for lithium charger

The printed circuit board (PCB) exists in two formats for different programs - the archive is located. The dimensions of the finished printed circuit board in my case are 5 by 2.5 cm. I left space for fasteners on the sides.
How charging works
How does the ready-made circuit of such a charger work? First, the battery is charged with direct current, which is determined by the resistance of the resistor R5, with a standard value of 11 ohms, it will be approximately 100 mA. Further, when the rechargeable energy source has a voltage of 4.15-4.2 volts, constant voltage charging will begin. When the charging current drops to small values, LED D1 will turn off.

As you know, the standard voltage for charging Li-ion is 4.2V, this figure must be set at the output of the circuit without load, using a voltmeter, so the battery will be fully charged. If you lower the voltage a little, somewhere by 0.05-0.10 Volts, then your battery will not be fully charged, but this way it will last longer. Article author EGOR.
Discuss the article CHARGER FOR LITHIUM BATTERIES
Lithium batteries are a galvanic pair in which lithium salts serve as the cathode. Whether Lithium Ion, Lithium Polymer dry or hybrid battery, the charger fits all. Products can be in the form of a cylinder, or sealed soft packaging, the charging method for them is common, corresponding to the characteristics of the electrochemical reaction. How to charge a Li-ion battery?
There are several schemes for charging lithium batteries. The two-stage charging developed by SONY is more commonly used. Do not use devices with the use of pulsed charge and stepped charging, as for acid batteries.
Charging any kind of lithium-ion or lithium-polymer batteries requires strict adherence to voltage. On one element of a charged lithium battery, there should be no more than 4.2 V. The nominal voltage for them is 3.7 V.
Can lithium batteries be charged quickly, not fully? Yes. You can always recharge them. Battery operation at 40-80% of capacity lengthens the battery life.

Two-stage lithium battery charging circuit
The principle of the CC/CV circuit is constant charging current/constant voltage. How to charge a lithium battery according to this scheme?
The diagram before the 1st stage of charging shows a pre-stage to restore a deeply drained lithium battery, with a voltage at the terminals of at least 2.0 V. The first stage should restore 70-80% of the capacity. The charging current is chosen at 0.2-0.5 C. You can quickly charge it with a current of 0.5-1.0 C. (C is the capacity of lithium batteries, a digital value). What should be the charging voltage in the first stage? Stable, 5 V. When the voltage at the battery terminals 4.2 is reached, this is a transition signal to the second stage.
Now the charger maintains a stable voltage at the terminals, and the charging current decreases as the capacity rises. When its value decreases to 0.05-0.01 C, charging will end, the device will turn off, preventing recharging. The total capacity recovery time for a lithium battery does not exceed 3 hours.
If the Li-Ion battery is discharged deeper than 3.0 V, a “push” will be required. This consists in charging with a small current until there is 3.1 V at the terminals. Then the usual circuit is used.

How to control charging parameters
Since lithium batteries operate in a narrow terminal voltage range, they cannot be recharged above 4.2 V and allowed to discharge below 3 V. The charge controller is installed in the charger. But each cell or battery has its own breakers, PCB board or PCM protection modules. The batteries are equipped with protection against one or another factor. In case of violation of the parameter, it must turn off the jar, break the circuit.
The controller is a device that must implement control functions - switch CC / CV modes, control the amount of energy in banks, turn off charging. In this case, the assembly works, heats up.

Homemade charging circuits used for lithium batteries
- LM317 - a diagram of a simple charger with a charge indicator. It is not powered from the USB port.
- MAX1555, MAX1551 - specially for Li Batteries, installed in the power adapter from the phone to USB. There is a pre-charge function.
- LP2951 - the stabilizer limits the current, generates a stable voltage of 4.08-4.26V.
- MCP73831 is one of the simplest circuits, suitable for charging ionic and polymer devices.
If the battery consists of several cans, they are not always discharged evenly. When charging, a balancer is needed to distribute the charge and ensure an even charge of all the cans in the battery. The balancer can be separate or built into the battery connection diagram. The battery protection device is called BMS. Knowing how to charge devices, understanding the circuits, you can assemble a protective device circuit for a lithium battery with your own hands.

How to charge a 12 volt lithium battery
Each lithium battery is a sealed product of a cylindrical, prismatic shape, for Li-pol in soft packaging. All of them have a voltage of 3.6-4.2 V and a different capacity, measured in mAh. If you collect 3 banks in series, you get a battery with a voltage at the terminals of 10.8 - 12.6 V. The capacity for sequential charging is measured by the weakest lithium battery in the bundle.
You need to know how to properly charge a 18650 or Pol lithium battery at 12 volts. To return the capacity to the device, it is necessary to use the charger with the controller. It is important to have in the PCM assembly for each can, protection against under- and overcharging. Another scheme for unprotected lithium-ion batteries is the installation of a PCB - a control board, preferably with balancers, for uniform charging of cans.
On the charger, you must set the voltage at which the battery operates, 12.6 V. The number of cans and the charging current are set on the dashboard, equal to 0.2-0.5 C.
How to charge, suggest watching a video, charging method for 2, 3 18650 lithium batteries connected in series. A budget charger is used.
Charging options for lithium-ion lithium polymer batteries:
- Charger supplied with the device.
- Use the USB connector from electronic equipment - a computer. Here you can get a current of 0.5 A, charging will be long.
- From the cigarette lighter by purchasing an adapter with a set of ports. Choose the one that matches the parameters of the 12V battery.
- Universal charger "frog" with a dock for installing the gadget. How to charge? There is a charge indicator panel.
Experts advise using a regular charger to charge lithium batteries, the rest - only in force majeure circumstances. However, you need to know how to charge a lithium battery without a regular charger.

How to charge lithium batteries in a screwdriver
A lithium battery screwdriver is almost always an upgrade. If Ni-Cd cells had the same charging requirements, now they have become opposite. First of all, you need to purchase or assemble a charger, specifically for energy-intensive lithium batteries of a screwdriver with a form factor of 18650. The charging scheme is applied in two stages CC / CV.
Charging the lithium battery of the screwdriver is optimal when 20-50% of the capacity remains - one stick on the indicator. The more often you charge, the more stable the voltage at the terminals and the longer the life of the energy source. The smoother the voltage at the terminals, the more cycles the screwdriver's lithium battery will withstand.
If there are 2 batteries in the screwdriver, remove one, charge it by 50-60% and keep it in reserve. But always charge the second one at the end of work, even by 10%. The best temperature for charging is + 15-25 0 С. If it is minus, the battery of the screwdriver will not charge, but it can work up to -10 0.
How to charge the lithium battery of a screwdriver with a charger depends on the battery collection scheme from cans. In any case, the voltage on the charger must be equal to that declared for the device, and the current strength should be 0.5 C at the first stage. On the second, the terminal voltage is stable, and the current drops, until the end of the process.

How much to charge a lithium battery
The battery charging time is determined by the capacity recovery process. Distinguish between full and partial charge.
Capacitance is measured in amp-hours. This means that if you apply a charge numerically equal to the capacitance, then in an hour the required voltage will be created at the terminals, and the energy reserve will be 70-80%. If the capacitance is measured in units of C, a current of 1C-2C should be applied during fast charging. Fast charging time is about an hour.
For a full charge cycle of batteries from several cells connected in series, 2 stages are used - CC / CV. The SS stage lasts until a voltage equal to the operating voltage, in volts, appears on the terminals. The second stage: at a stable voltage, current is supplied to the jar, but with an increase in capacitance, it tends to zero. Charging time takes about 3 hours, regardless of capacity.
Can a lithium battery be charged by normal charging?
Two different battery systems - lithium and lead - require a different approach to restore capacity. Lead batteries are not as demanding on charging parameters as lithium ones. Yes, and the criteria for the charge are different.
For charging in the first stage Li-ion, Li-pol requires a constant current, in the second stage a constant voltage. If you do not control the parameters at the first stage, overcharging is possible. But if the battery has built-in protection - BMS - it can handle it. Therefore, you can even add some energy with a phone charger.
In a lead-acid battery charger, the main indicator is a stable voltage. For lithium chargers, a stable current is important at the first stage.

True, universal memory devices have appeared that can be reconfigured to one or another charging mode. Before you is the Russian development "Pendant".
Lithium batteries (Li-Io, Li-Po) are currently the most popular rechargeable sources of electrical energy. The lithium battery has a nominal voltage of 3.7 volts, which is indicated on the case. However, a 100% charged battery has a voltage of 4.2 V, and a discharged “to zero” voltage is 2.5 V, it makes no sense to discharge the battery below 3 V, firstly, it deteriorates from this, and secondly, in the range from 3 to 2.5 The battery gives only a couple of percent of the energy. Thus, we accept the operating voltage range of 3 - 4.2 Volts. You can watch my selection of tips on the operation and storage of lithium batteries in this video.
There are two options for connecting batteries, series and parallel.

When connected in series, the voltage on all batteries is summed up, when a load is connected, a current equal to the total current in the circuit flows from each battery, in general, the load resistance sets the discharge current. You should remember this from school. Now the fun part, capacity. The capacity of the assembly with such a connection is good equal to the capacity of the battery with the smallest capacity. Imagine that all batteries are 100% charged. Look, the discharge current is the same everywhere, and the battery with the smallest capacity will be discharged first, this is at least logical. And as soon as it is discharged, it will no longer be possible to load this assembly further. Yes, the rest of the batteries are still charged. But if we continue to remove the current, then our weak battery will begin to over-discharge, and fail. That is, it is correct to assume that the capacity of a series-connected assembly is equal to the capacity of the smallest or most discharged battery. From this we conclude: it is necessary to assemble a serial battery, first of all, from batteries of the same capacity, and secondly, before assembly, they must all be charged equally, in other words, 100%. There is such a thing called BMS (Battery Monitoring System), it can monitor each battery in the battery, and as soon as one of them is discharged, it disconnects the entire battery from the load, this will be discussed below. Now as for charging such a battery. You need to charge it with a voltage equal to the sum of the maximum voltages on all batteries. For lithium this is 4.2 volts. That is, we charge a battery of three with a voltage of 12.6 V. See what happens if the batteries are not the same. The battery with the smallest capacity will charge the fastest. But the others haven't loaded yet. And our poor battery will fry and recharge until the rest are charged. Overdischarge, I remind you, lithium also does not like very much and deteriorates. To avoid this, we recall the previous conclusion.
Let's move on to parallel connection. The capacity of such a battery is equal to the sum of the capacities of all the batteries included in it. The discharge current for each cell is equal to the total load current divided by the number of cells. That is, the more batteries in such an assembly, the more current it can give. But with tension, an interesting thing happens. If we collect batteries that have different voltages, that is, roughly speaking, charged to different percentages, then after connection they will begin to exchange energy until the voltage on all cells becomes the same. We conclude: before assembly, the batteries must again be charged in the same way, otherwise large currents will flow when connected, and the discharged battery will be damaged, and most likely it may even catch fire. In the process of discharging, the batteries also exchange energy, that is, if one of the cans has a lower capacity, the rest will not allow it to discharge faster than themselves, that is, batteries with different capacities can be used in a parallel assembly. The only exception is high current operation. On different batteries under load, the voltage sags differently, and current will start to run between the “strong” and “weak” batteries, and we don’t need this at all. And the same goes for charging. You can absolutely safely charge batteries of different capacities in parallel, that is, balancing is not needed, the assembly will balance itself.
In both cases considered, the charging current and the discharging current must be observed. The charging current for Li-Io should not exceed half the battery capacity in amperes (1000 mah battery - charge 0.5 A, battery 2 Ah, charge 1 A). The maximum discharge current is usually indicated in the datasheet (TTX) of the battery. For example: laptop 18650 batteries and batteries from smartphones cannot be loaded with a current exceeding 2 battery capacities in Amperes (example: 2500 mah battery, which means you need to take a maximum of 2.5 * 2 = 5 Amperes from it). But there are high-current batteries, where the discharge current is clearly indicated in the specifications.
Features of charging batteries with Chinese modules
Standard purchased charging and protection module for 20 rubles for lithium battery ( Aliexpress link)
(positioned by the seller as a module for one can of 18650) can and will charge any lithium battery regardless of shape, size and capacity to the correct voltage of 4.2 volts (the voltage of a fully charged battery, to the eyeballs). Even if it is a huge 8000mah lithium package (of course, we are talking about one cell at 3.6-3.7v). The module gives a charging current of 1 amp, this means that they can safely charge any battery with a capacity of 2000mah and above (2Ah, which means the charging current is half the capacity, 1A) and, accordingly, the charging time in hours will be equal to the battery capacity in amperes (in fact, a little more, one and a half to two hours for every 1000mah). By the way, the battery can be connected to the load already during the charge.

Important! If you want to charge a battery with a smaller capacity (for example, one old 900mah can or a tiny 230mah lithium sachet), then 1A charging current is a lot, it should be reduced. This is done by replacing the resistor R3 on the module according to the attached table. The resistor is not necessarily smd, the most common one will do. I remind you that the charging current should be half the capacity of the battery (or less, it's not scary).
But if the seller says that this module is for one 18650 can, can it charge two cans? Or three? What if you need to assemble a capacious power bank from several batteries?
CAN! All lithium batteries can be connected in parallel (all pluses to pluses, all minuses to minuses) REGARDLESS OF THE CAPACITY. Batteries soldered in parallel maintain an operating voltage of 4.2v and their capacity adds up. Even if you take one can at 3400mah and the second at 900, you get 4300. Batteries will work as a whole and will be discharged in proportion to their capacity.
The voltage in the PARALLEL ASSEMBLY IS ALWAYS THE SAME ON ALL BATTERIES! And not a single battery can be physically discharged in an assembly before others; the principle of communicating vessels works here. Those who claim the opposite and say that batteries with a lower capacity will discharge faster and die - they are confused with SERIAL assembly, spit in their face. 
Important! Before connecting to each other, all batteries must have approximately the same voltage so that equalizing currents do not flow between them at the time of soldering, they can be very large. Therefore, it is best to simply charge each battery individually before assembly. Of course, the charging time of the entire assembly will increase, since you use the same 1A module. But you can parallelize two modules, getting a charging current of up to 2A (if your charger can give that much). To do this, you need to connect all similar terminals of the modules with jumpers (except for Out- and B +, they are duplicated on the boards by other nickels, they will already be connected anyway). Or you can buy a module ( Aliexpress link), on which the microcircuits are already in parallel. This module is capable of charging with a current of 3 Amperes.
Sorry to be so obvious, but people still get confused, so we'll have to discuss the difference between parallel and series.
PARALLEL the connection (all pluses to pluses, all minuses to minuses) keeps the battery voltage at 4.2 volts, but increases the capacity by adding all the capacitances together. All power banks use a parallel connection of several batteries. Such an assembly can still be charged from USB and the boost converter raises the voltage to the output 5v.
SEQUENTIAL connection (each plus to the minus of the subsequent battery) gives a multiple increase in the voltage of one charged can of 4.2v (2s - 8.4v, 3s - 12.6v, and so on), but the capacity remains the same. If three 2000mah batteries are used, then the assembly capacity is 2000mah.
Important! It is believed that for sequential assembly it is sacred that it is necessary to use only batteries of the same capacity. Actually it is not. You can use different ones, but then the battery capacity will be determined by the LOWEST capacity in the assembly. Add up 3000 + 3000 + 800 - you get an 800mah build. Then the specialists begin to crow that then a less capacious battery will discharge faster and die. And it doesn't matter! The main and truly sacred rule is that for sequential assembly, it is always necessary to use a BMS protection board for the required number of cans. It will determine the voltage on each cell and turn off the entire assembly if one is discharged first. In the case of a bank of 800, it will be discharged, the BMS will disconnect the load from the battery, the discharge will stop and the residual charge of 2200mah on the remaining banks will no longer matter - you need to charge.
The BMS board, unlike the single charger module, IS NOT A SERIAL CHARGER. Required for charging configured source of the desired voltage and current. Guyver made a video about this, so don't waste your time, watch it, it's about it as thoroughly as possible.
Is it possible to charge a series assembly by connecting several single charging modules?
In fact, under certain assumptions, it is possible. For some homemade products, a circuit using single modules, also connected in series, has proven itself, but EACH module needs its own SEPARATE POWER SUPPLY. If you charge 3s - take three phone chargers and connect each to one module. When using a single source - power short circuit, nothing works. Such a system also works as a protection for the assembly (but the modules are capable of delivering no more than 3 amperes). Or, simply charge the assembly by the cell, connecting the module to each battery until it is fully charged.
Battery indicator 
It is also an urgent problem - at least to know approximately how much percent of the charge remains on the battery so that it does not run out at the most crucial moment.
For parallel assemblies at 4.2 volts, the most obvious solution would be to immediately purchase a ready-made power bank board, which already has a display showing charge percentages. These percentages are not super-accurate, but still help. The issue price is about 150-200 rubles, all are presented on the Guyver website. Even if you are not building a power bank, but something else, this board is quite cheap and small to place it in a homemade product. Plus, it already has the function of charging and protecting batteries.
There are ready-made miniature indicators for one or more cans, 90-100r  Well, the cheapest and most popular method is to use the MT3608 boost converter (30 rubles), set to 5-5.1v. Actually, if you make a power bank on any 5-volt converter, then you don’t even need to buy anything. The refinement consists in installing a red or green LED (other colors will work at a different output voltage, from 6V and above) through a current-limiting resistor of 200-500 ohms between the output positive terminal (this will be a plus) and the input positive terminal (for an LED, this will be a minus). You are not mistaken, between two pluses! The fact is that during the operation of the converter, a voltage difference is created between the pluses, +4.2 and + 5V give a voltage of 0.8V between themselves. When the battery is discharged, its voltage will drop, and the output from the converter is always stable, which means the difference will increase. And when the voltage on the bank is 3.2-3.4V, the difference will reach the required value to light the LED - it starts to show that it's time to charge.
How to measure battery capacity?

We are already accustomed to the opinion that Imax b6 is needed for measurement, but it costs money and is redundant for most radio amateurs. But there is a way to measure the capacity of a 1-2-3-cell battery with sufficient accuracy and cheaply - a simple USB tester.
Today, many users have accumulated several working and unused lithium batteries that appear when replacing mobile phones with smartphones.

When using batteries in phones with their own charger, due to the use of specialized microcircuits for charge control, there are practically no problems with charging. But when using lithium batteries in various homemade products, the question arises of how and with what to charge such batteries. Some believe that lithium batteries already contain built-in charge controllers, but in fact they have built-in protection circuits, such batteries are called protected. The protection circuits in them are mainly designed to protect against deep discharge and overvoltage when charging above 4.25V, i.e. This is an emergency protection, not a charge controller.
Some "home-made" on the site will immediately write that for little money you can order a special board from China, with which you can charge lithium batteries. But this is only for lovers of "shopping". It makes no sense to buy something that is easily assembled in a few minutes from cheap and common parts. Do not forget that the ordered board will have to wait about a month. And a purchased device does not bring such satisfaction as a do-it-yourself one.
The proposed charger is able to repeat almost everyone. This scheme is very primitive, but completely copes with its task. All that is required for high-quality charging of Li-Ion batteries is to stabilize the output voltage of the charger and limit the charge current.
The charger is distinguished by reliability, compactness and high stability of the output voltage, and, as you know, for lithium-ion batteries, this is a very important characteristic when charging.
Charger circuit for li-ion battery
The charger circuit is made on an adjustable voltage regulator TL431 and a medium power NPN bipolar transistor. The circuit allows you to limit the charging current of the battery and stabilizes the output voltage.

Transistor T1 acts as a regulating element. Resistor R2 limits the charge current, the value of which depends only on the parameters of the battery. It is recommended to use a 1W resistor. Other resistors may be 125 or 250 mW.
The choice of transistor is determined by the required charging current set to charge the battery. For the case under consideration, charging batteries from mobile phones, you can use domestic or imported medium power NPN transistors (for example, KT815, KT817, KT819). When the input voltage is high or low power transistor is used, it is necessary to install the transistor on the heatsink.
The LED1 LED (highlighted in red in the diagram) is used for visual signaling of the battery charge. When you turn on a discharged battery, the indicator glows brightly and dims as it charges. The indicator glow is proportional to the battery charge current. But it should be noted that when the LED is completely attenuated, the battery will still be charged with a current of less than 50mA, which requires periodic monitoring of the device to prevent overcharging.
To improve the accuracy of monitoring the end of the charge, an additional option for indicating the battery charge (highlighted in green) on the LED2 LED, low-power PNP transistor KT361 and current sensor R5 has been added to the charger circuit. It is possible to use any indicator option in the device, depending on the required accuracy of battery charge control.
The presented circuit is designed to charge only one Li-ion battery. But this charger can also be used to charge other types of batteries. It is only required to set the required value of the output voltage and the charging current.
Charger manufacturing
1. We purchase or select from available components for assembly in accordance with the diagram.
2. Assembling the circuit.
To check the performance of the circuit and its settings, we assemble the charger on the circuit board.

The diode in the battery power circuit (negative bus - blue wire) is designed to prevent the discharge of a lithium-ion battery in the absence of voltage at the input of the charger.
3. Setting the output voltage of the circuit.
We connect the circuit to a power source with a voltage of 5 ... 9 volts. By trimming resistance R3, we set the output voltage of the charger in the range of 4.18 - 4.20 volts (if necessary, at the end of the adjustment we measure its resistance and put a resistor with the desired resistance).
4. Setting the charging current of the circuit.
Having connected a discharged battery to the circuit (which will be reported by the switched on LED), with the resistor R2 we set the value of the charging current (100 ... 300 mA) according to the tester. If the resistance R2 is less than 3 ohms, the LED may not light up.
5. We are preparing a board for mounting and soldering parts.
We cut out the required size from the universal board, carefully process the edges of the board with a file, clean and tin the contact tracks.

6. Mounting a debugged circuit on a working board
We transfer the parts from the circuit board to the working one, solder the parts, perform the missing wiring of the connections with a thin mounting wire. Upon completion of the assembly, we thoroughly check the installation.

The charger can be assembled in any convenient way, including surface mounting. When installed without errors and serviceable parts, it starts working immediately after switching on.

When connected to a charger, a discharged battery begins to consume maximum current (limited by R2). When the battery voltage approaches the set value, the charge current will drop and when the battery voltage reaches 4.2 volts, the charging current will be almost zero.
However, leaving the battery connected to the charger for a long time is not recommended, as he does not like to overcharge even with a small current and may explode or catch fire.
If the device does not work, then it is necessary to check the control output (1) TL431 for voltage. Its value must be at least 2.5 V. This is the smallest acceptable reference voltage value for this microcircuit. The TL431 chip is quite common, especially in computer power supplies.